Episode 17- VEX or VOPs- Does it take two to Tango?
This week we’re diving into something I’ve been actively avoiding because it sounds scary/difficult. I guess I’m feeling brave. I’ve begun waking up at 5am this week in an attempt to be more productive during the day, (I tend to lose focus in the afternoon) I think it’s starting to rub off in other ways as well.
Regardless of reason, this week I’m exploring VEX vs VOPs in Houdini. For those of you that have been following this journey closely from the beginning, I’ve actually mentioned these things a handful of times, but never gone into much depth about them. VEX, or Vector Expression Language, is the coding language used in Houdini. VOPs, or Vector Operators, are “Small chunks of Vex code packaged as nodes” (excerpt from a tutorial I’m working through by NineBetween on Youtube).
These 2 things go hand in hand as you can probably imagine. While VEX is far more versatile and powerful in many ways, you need a much more in-depth knowledge of how the language operates and what everything does in order to write it and use it in any meaningful way. VOPs on the other hand, is more narrowly focused on the nodes that are pre-built, (of which there are MANY) but you can pretty much dive right in and work with them straight away. No coding knowledge required. (Or at least, not much.)
Buckle up, because here comes the nitty-gritty stuff.
We walked through a super simple application of the 2 ways of communicating in code with Houdini. In VOPs you can drop down an “Attribute Wrangle” node within a geometry node. It looks like this:

You can see the inputs on top. Typically you’d have geometry or points or SOMETHING you can connect into it, then affect whatever that thing is. For example, change the color of a cube, or modify point positions on a sphere. In this example we went over just affecting detail (basically it just doesn’t affect anything tangible other than data), so at the top we changed “run over” from primitives to Detail. Ok, now we can dive into this node. Inside currently looks like this:

These are global variables that are built-in to bring in info and affect something about a piece of geometry or points, so in this example we deleted them. In this example, we’re going to take 2 numbers, multiply them by each other, then output that number as data we can access in a scene or animation. So first we can drop down 2 Constants, making note to set them as integers if we only need round numbers and floats if we need decimal points and more exact numbers. We used integers to keep this simple. Its now looks like this:

Under “Constant Name” We’ll call these X and Y. Now we’ll drop down a multiply node and plug both inputs into it. This does pretty much exactly what you’d think it does. We need one more thing however- A place to send this data. Right now, it looks like this:
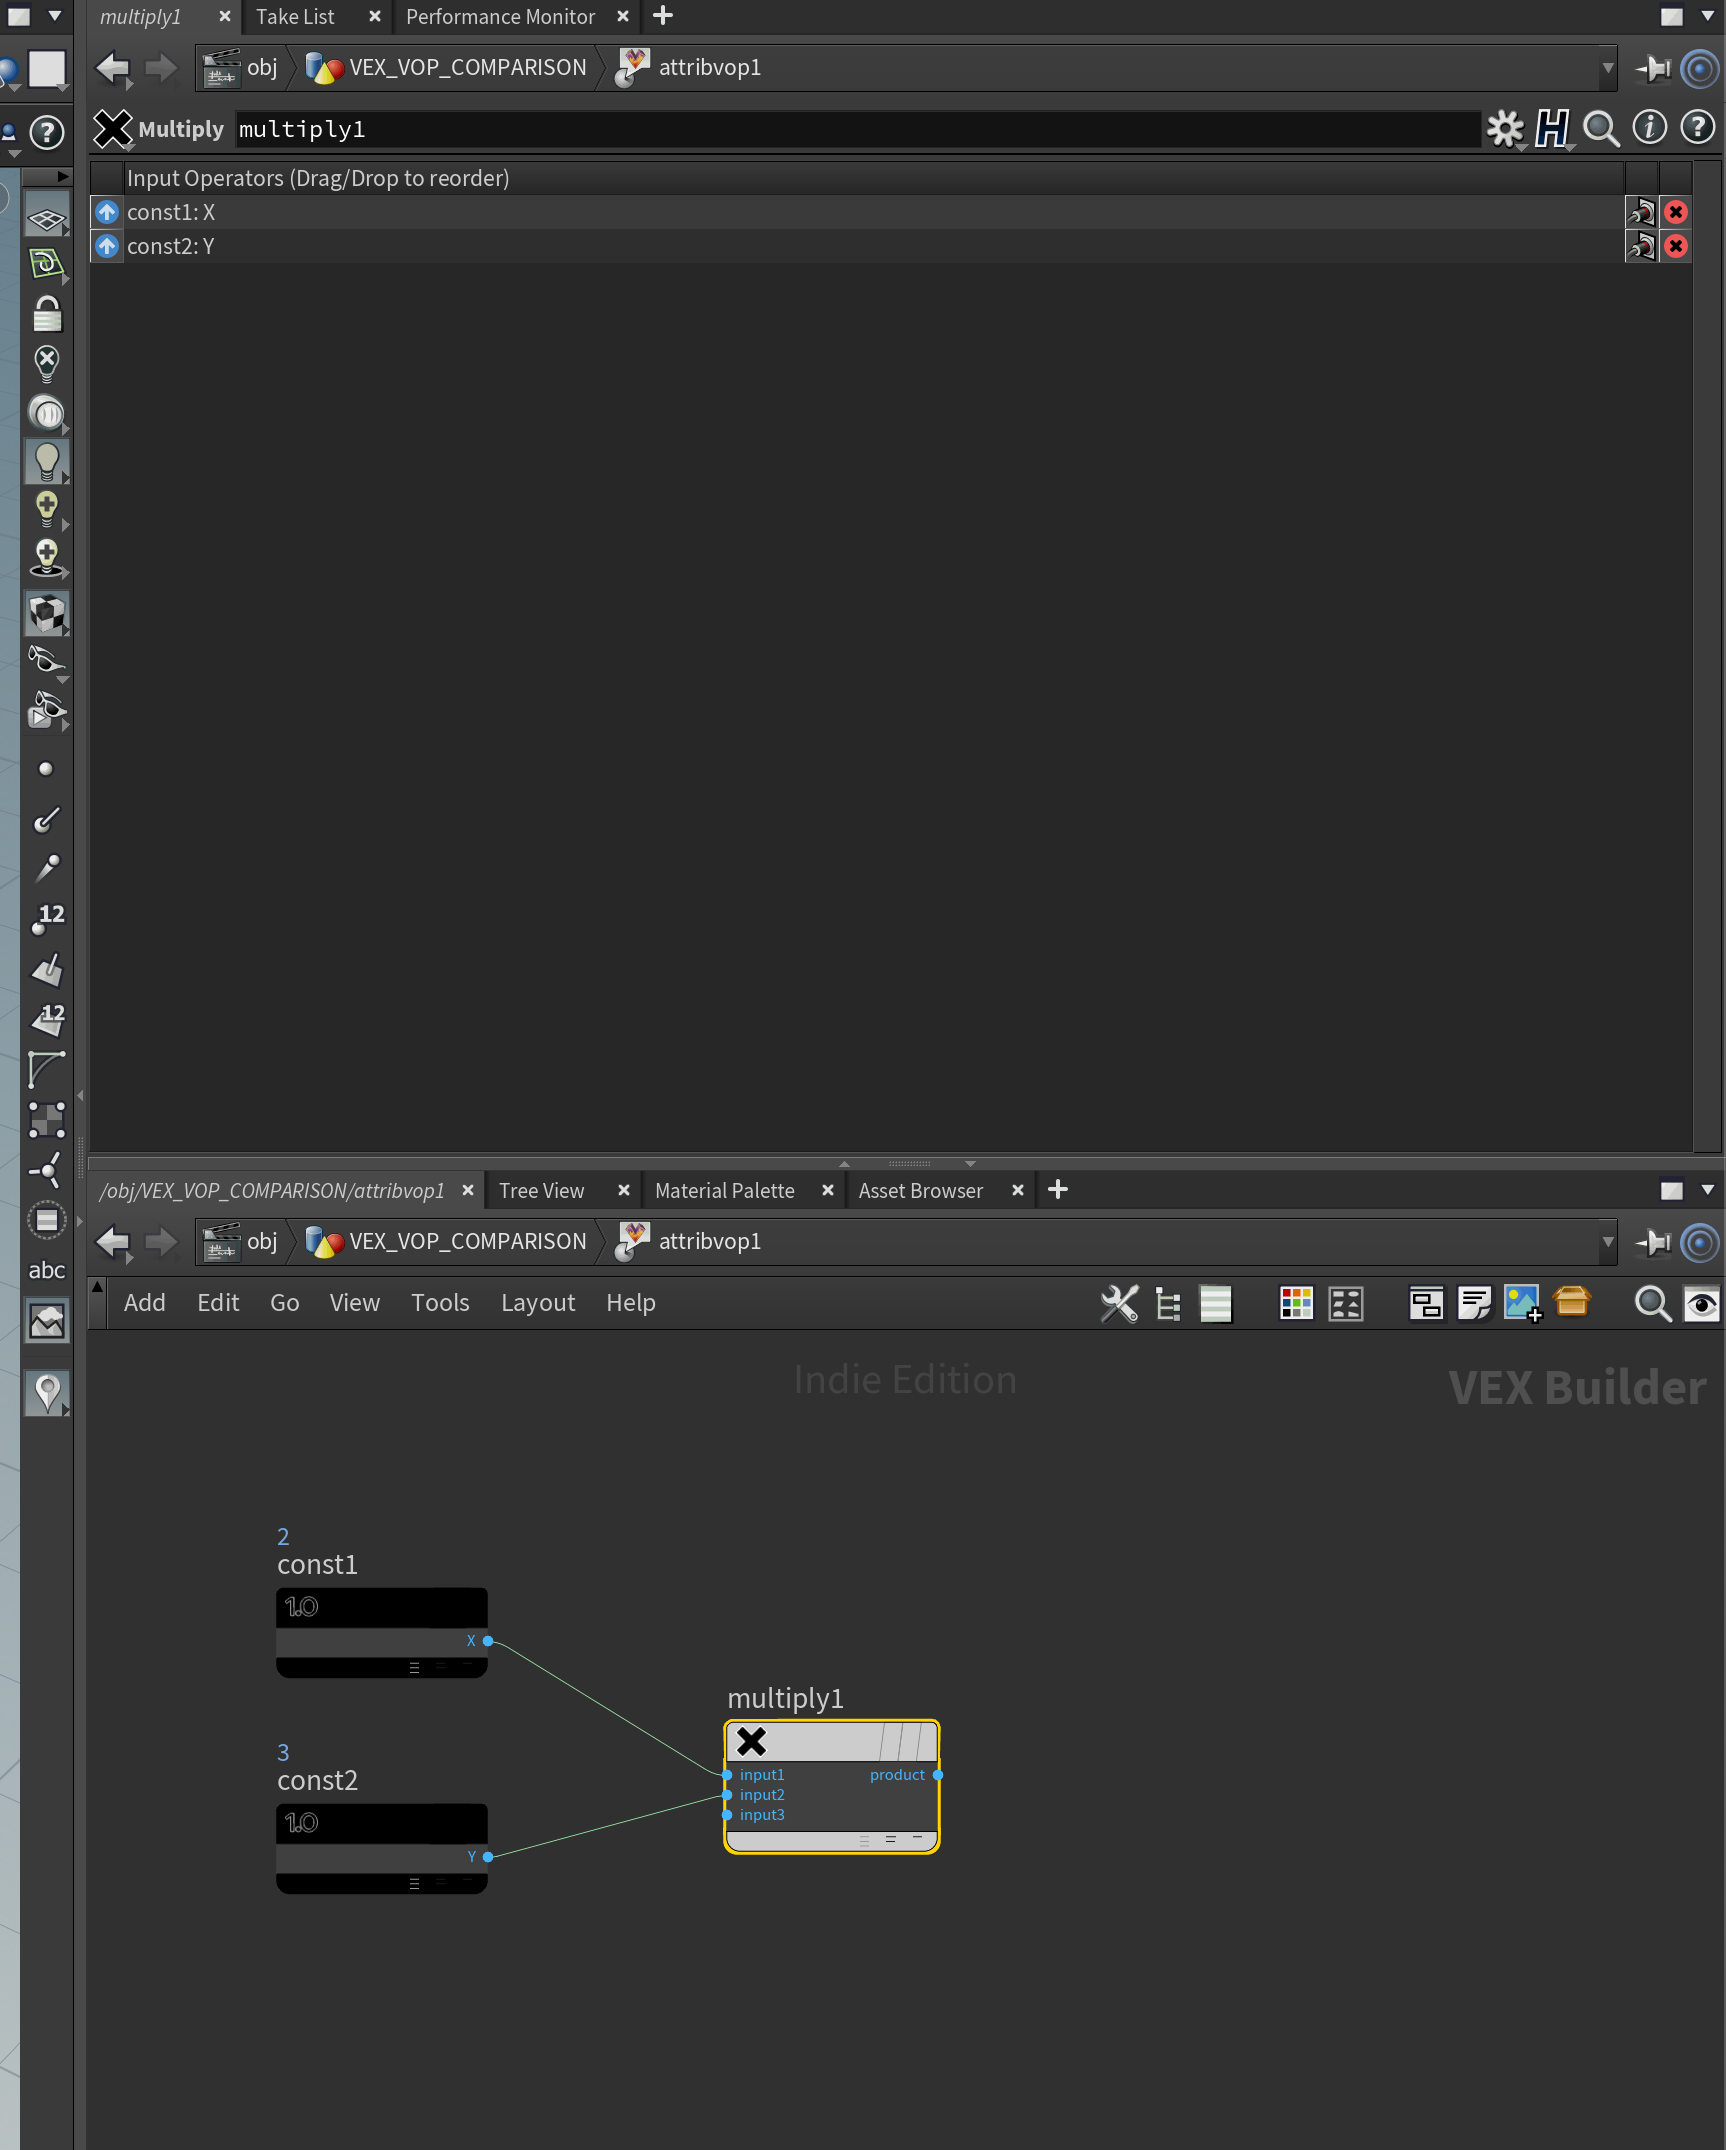
So to give it a place to go, we’ll add a node called Bind Attribute. This, as you might imagine, binds the resulting number or data to an attribute. We named this attribute “Product”. So if we navigate to the geometry spreadsheet and select detail at the top, we see the attribute product and its detail is set to 6. (The numbers we assigned to the constants we multiplied were 2 and 3.) So we did some basic math! We could then take this data and use it to drive an animation, but since we’re comparing VEX and VOPs, we’ll ignore that and see what it takes to do the same thing in VEX.


In VEX, though there are fewer steps, if you don’t know how to write VEX code, you just straight up can’t do this. There’s no puzzling your way through writing code like you might be able to with VOPs nodes. Having said that, let’s dig in.
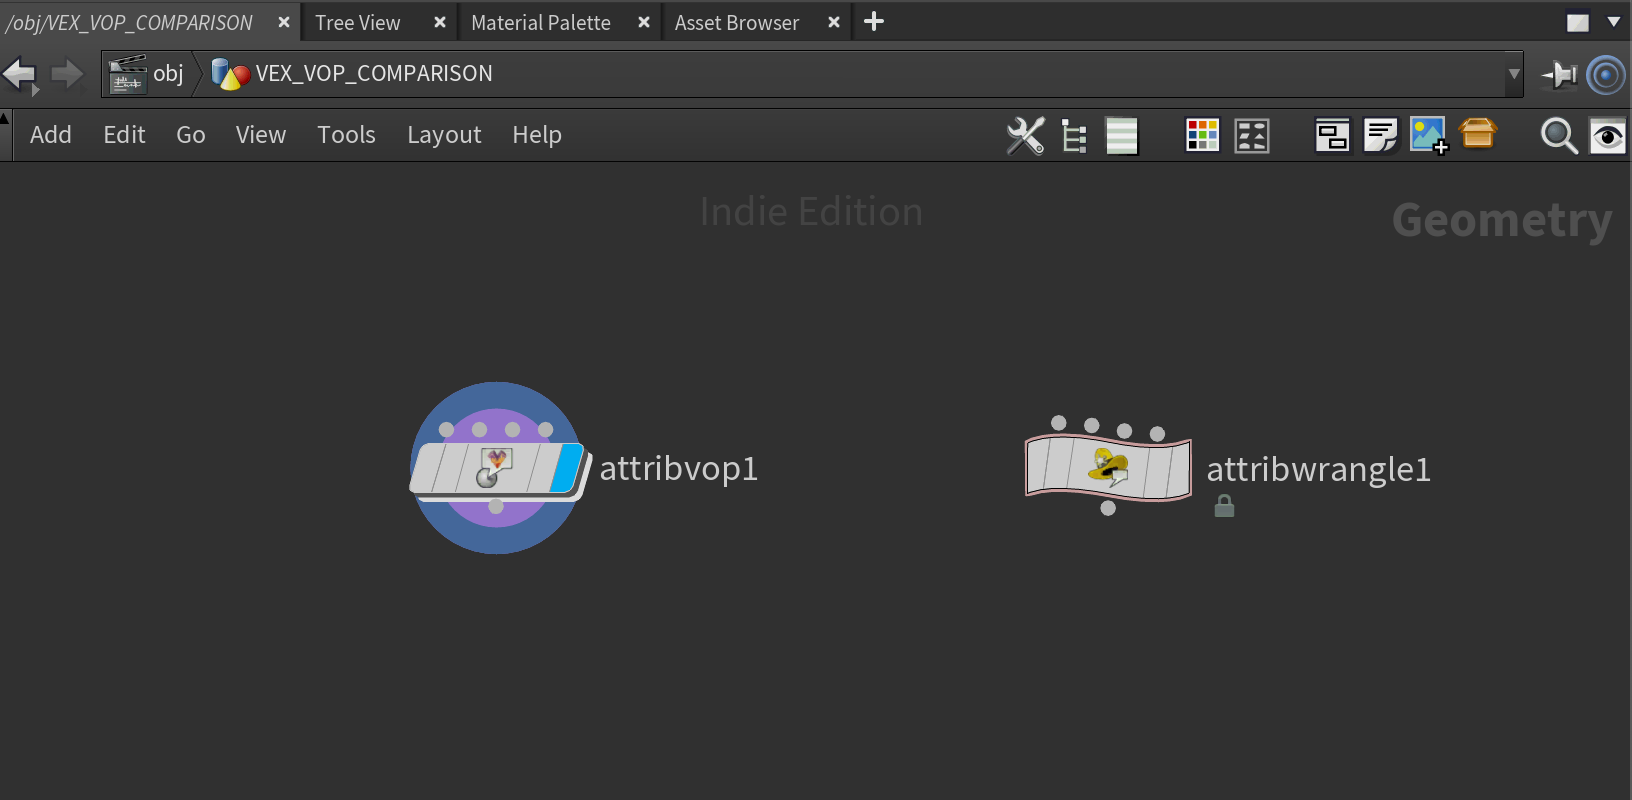
Back in the Geometry node, we can drop another node called “Attribute Wrangle”. Please note the cute cowboy hat it has:
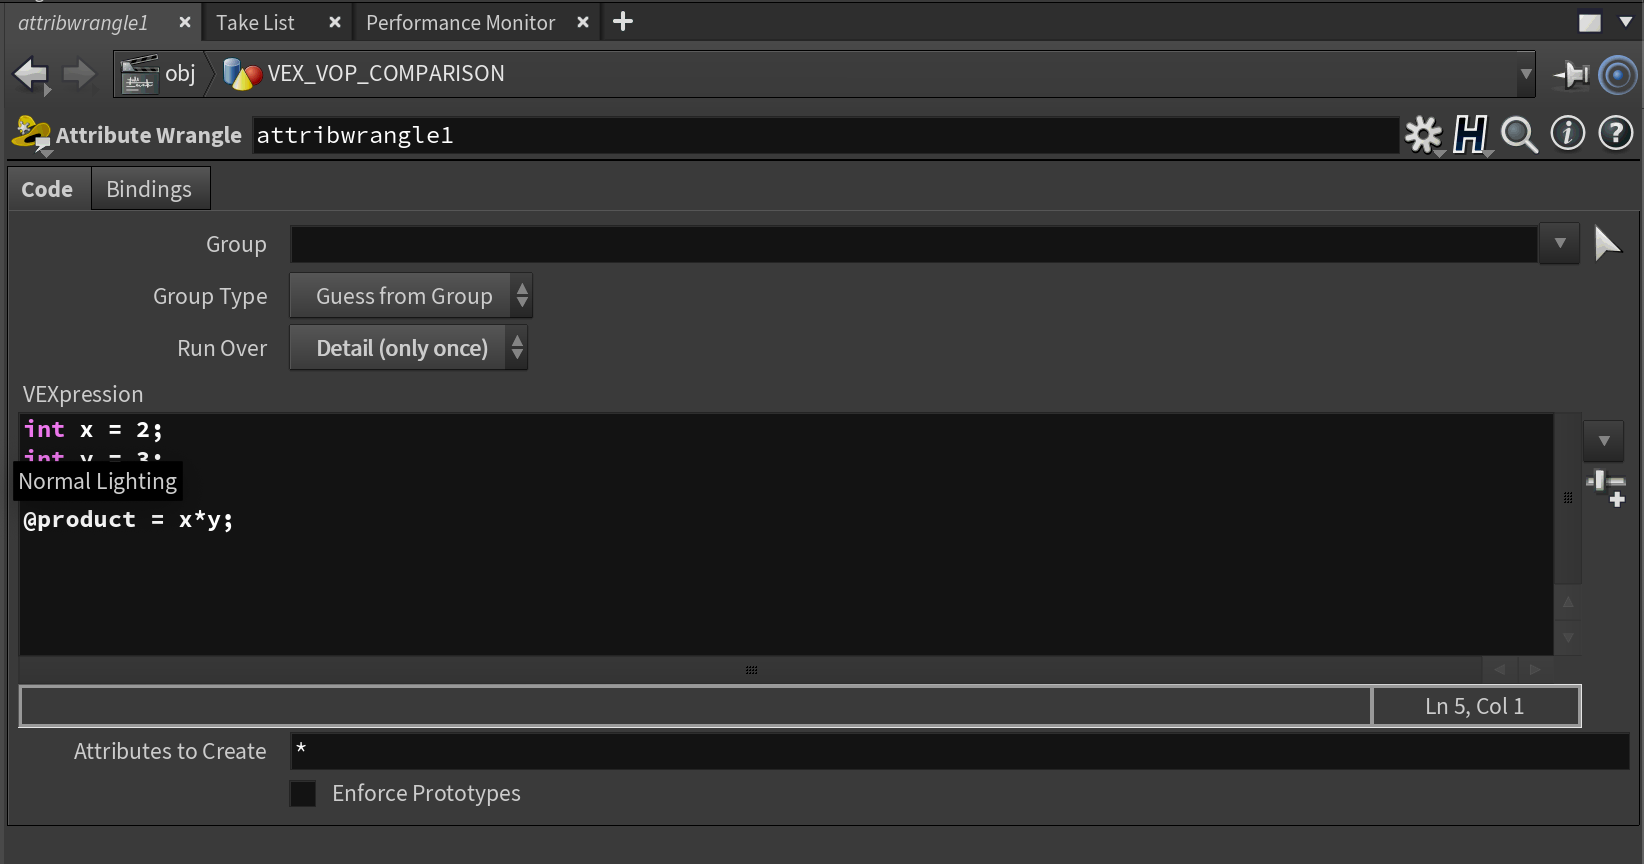
So for this node, we don’t have to dive inside it. Everything we need is right in our panel above. We’ll once again see that we have a “run over” option to tell the computer what we need it to look at. Then we can start writing VEX code right in the panel, creatively labeled “VEXpression”. Cute guys. Ok, so like many coding languages, first we’ll define our variables. This will look like this:

Next we’ll write this string of code: @product = x*y;
The @ symbol followed by a word tells Houdini that this is an attribute. So if you’ve already defined this attribute earlier on in the code, anything you do in that line of code will affect that attribute. If you haven’t defined that attribute yet, it’ll create it. So now we’ve created 2 integers and defined them as 2 and 3, made an attribute, and defined it as x*y. Looks like this in the panel:
If we go over to our geometry spreadsheet again, BAM. We’ve just produced the same result in 2 different ways. There are a ton of use cases for each, and so now we can start learning both and when each is more useful.
I know this wasn’t the most exciting post, but it’s a really necessary one. This stuff is the bedrock on which Houdini draws its power. Master the code, master the program.
Later nerds, I’m gonna take a break and play some Minecraft.
Jake-out.