Episode 5- Return of the Render
Let me just start by saying- If the last couple of weeks learning Houdini were a scene in a movie, they’d be that one scene in Empire Strikes Back where Luke gets his arm lopped off and finds out that his father is his one true enemy, Darth Vader. Which would make this week the scene in Return of the Jedi where they save Han from Jabba the Hut. Sorry, spoiler alert it’s awesome. (Seriously, you guys haven’t seen this?)
I decided to temporarily jump ship on the tutorial series that I had been following along with because I found myself a little lost on certain sections understanding how the pieces all came together. Unfortunately, because the way my man Scotty had the series laid out, if you don’t understand one piece, it gets progressively harder to build upon with new skills. It’s an excellent tutorial series, but I just needed to supplement it with some classic Youtube Tutorials here and there.
Which brings me to this week.
This week I learned about the basics of rendering using Mantra, and lighting/texturing basics.
This week fucking ROCKED.
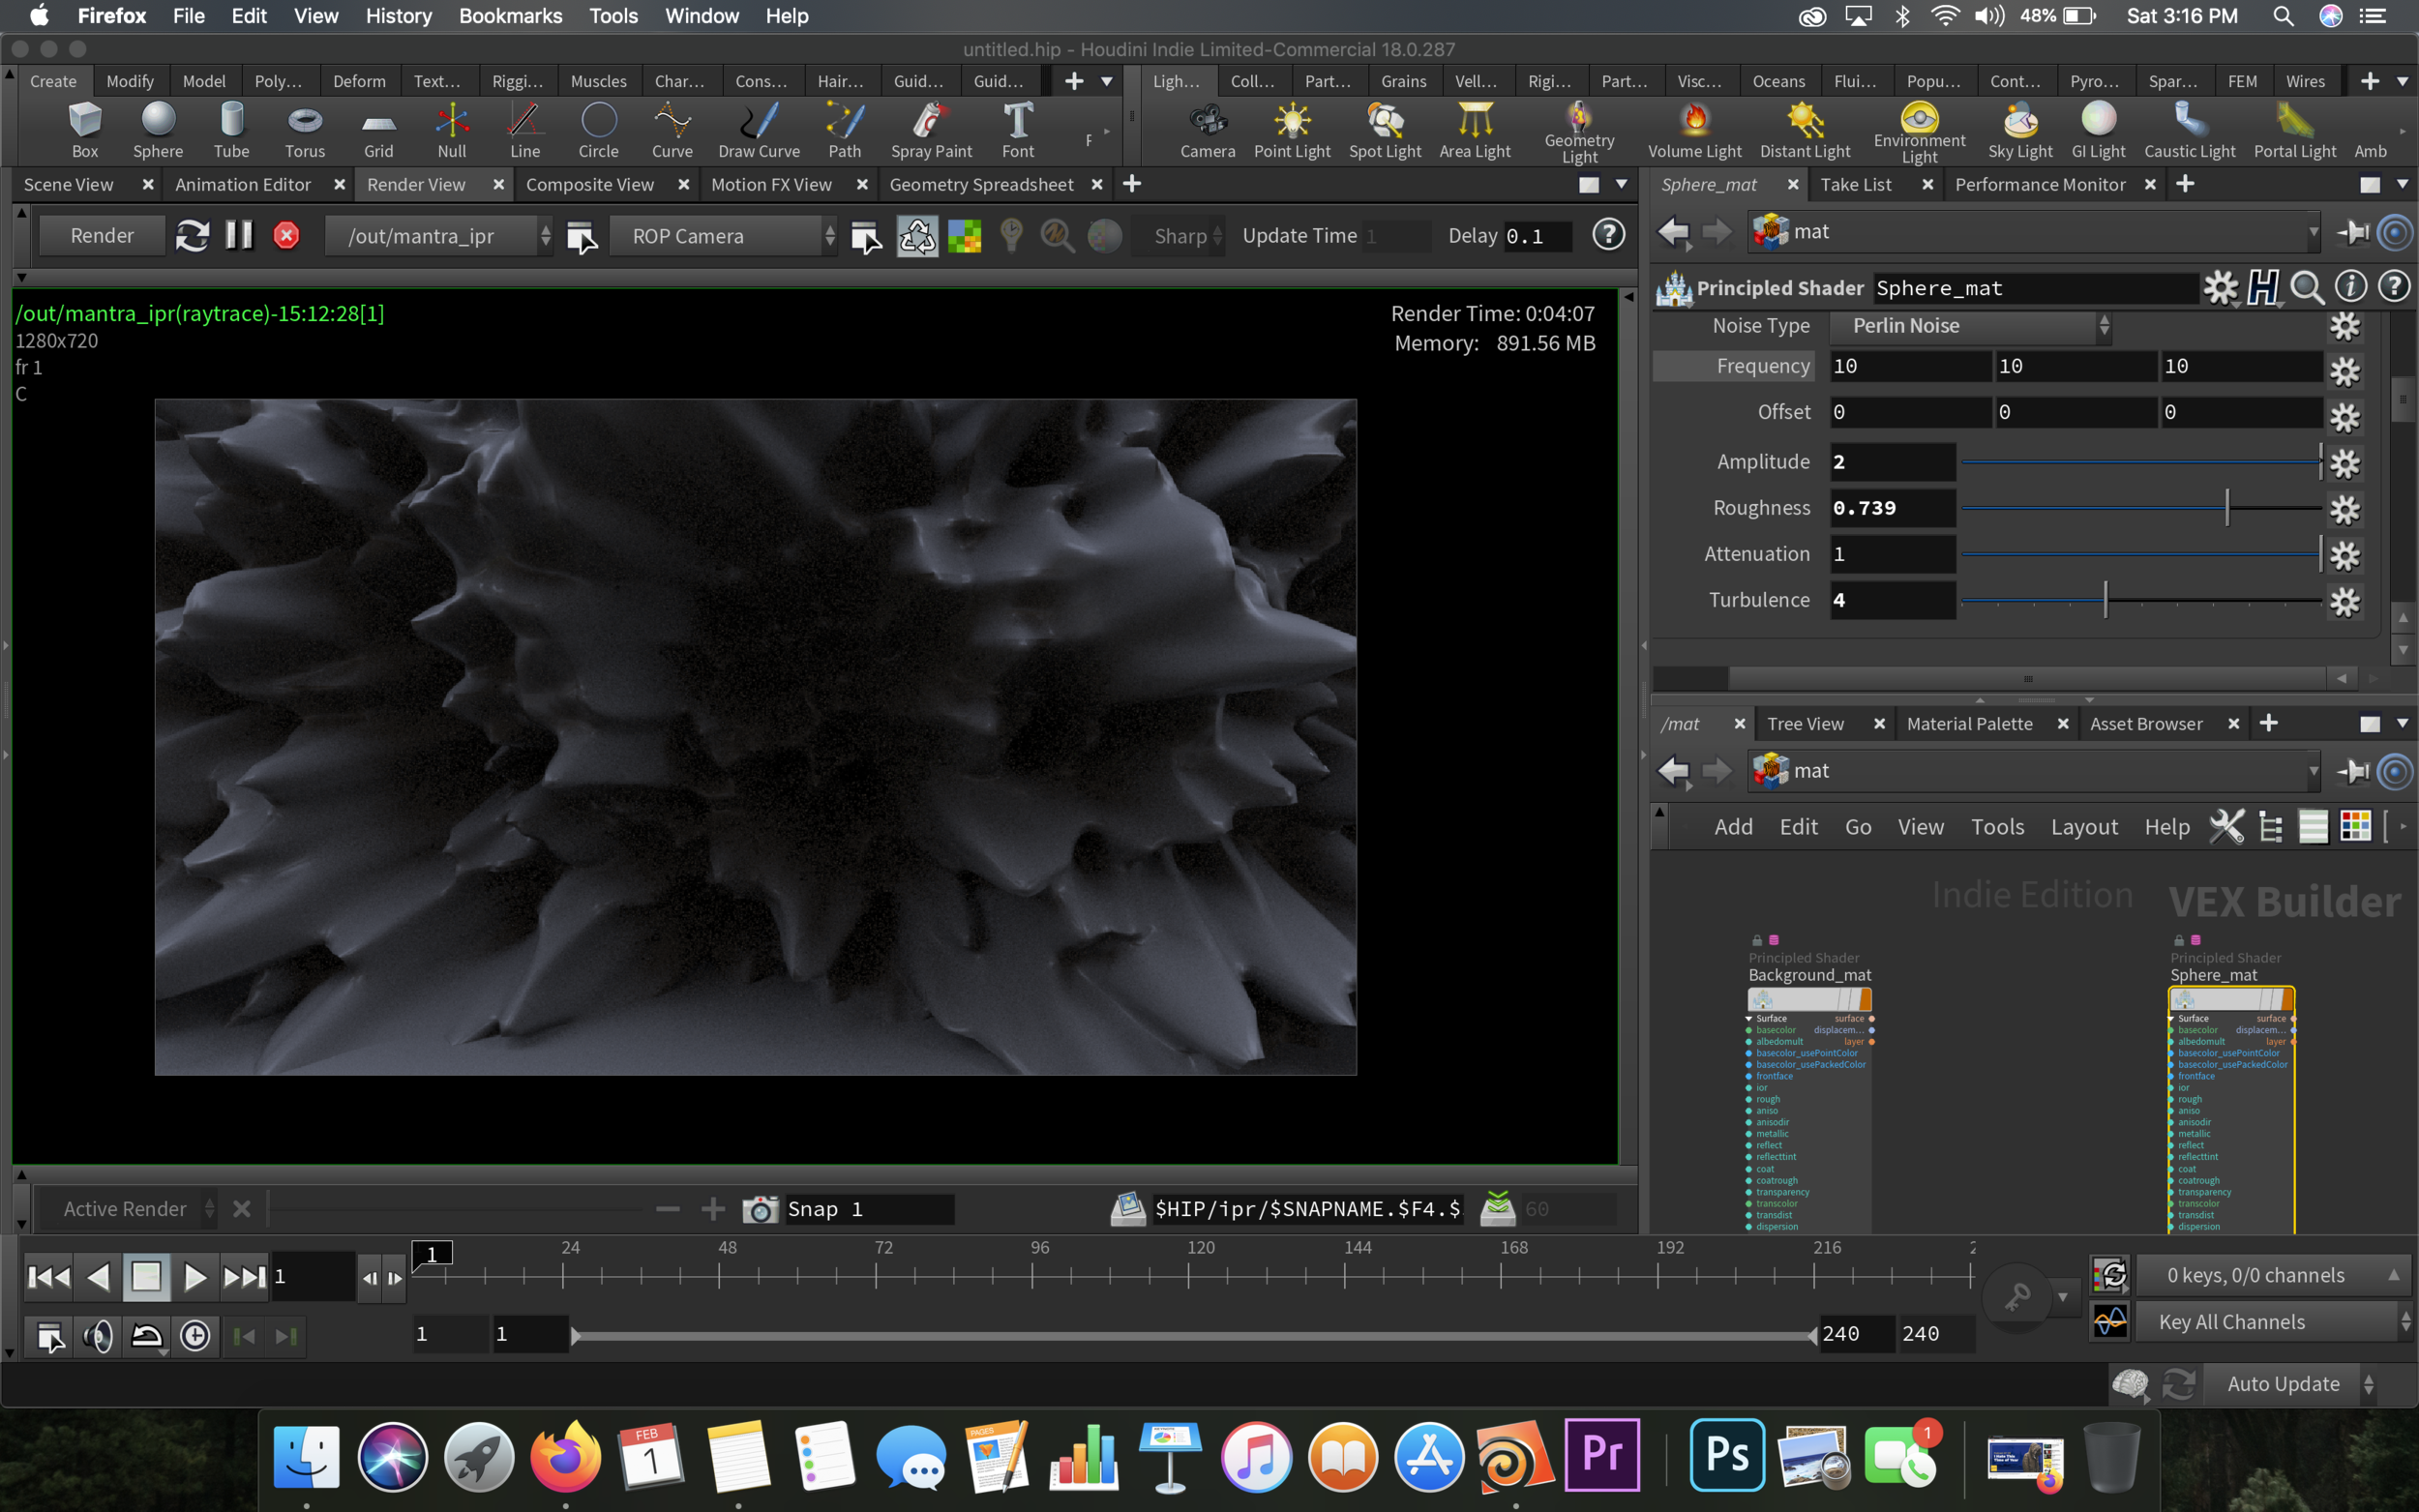
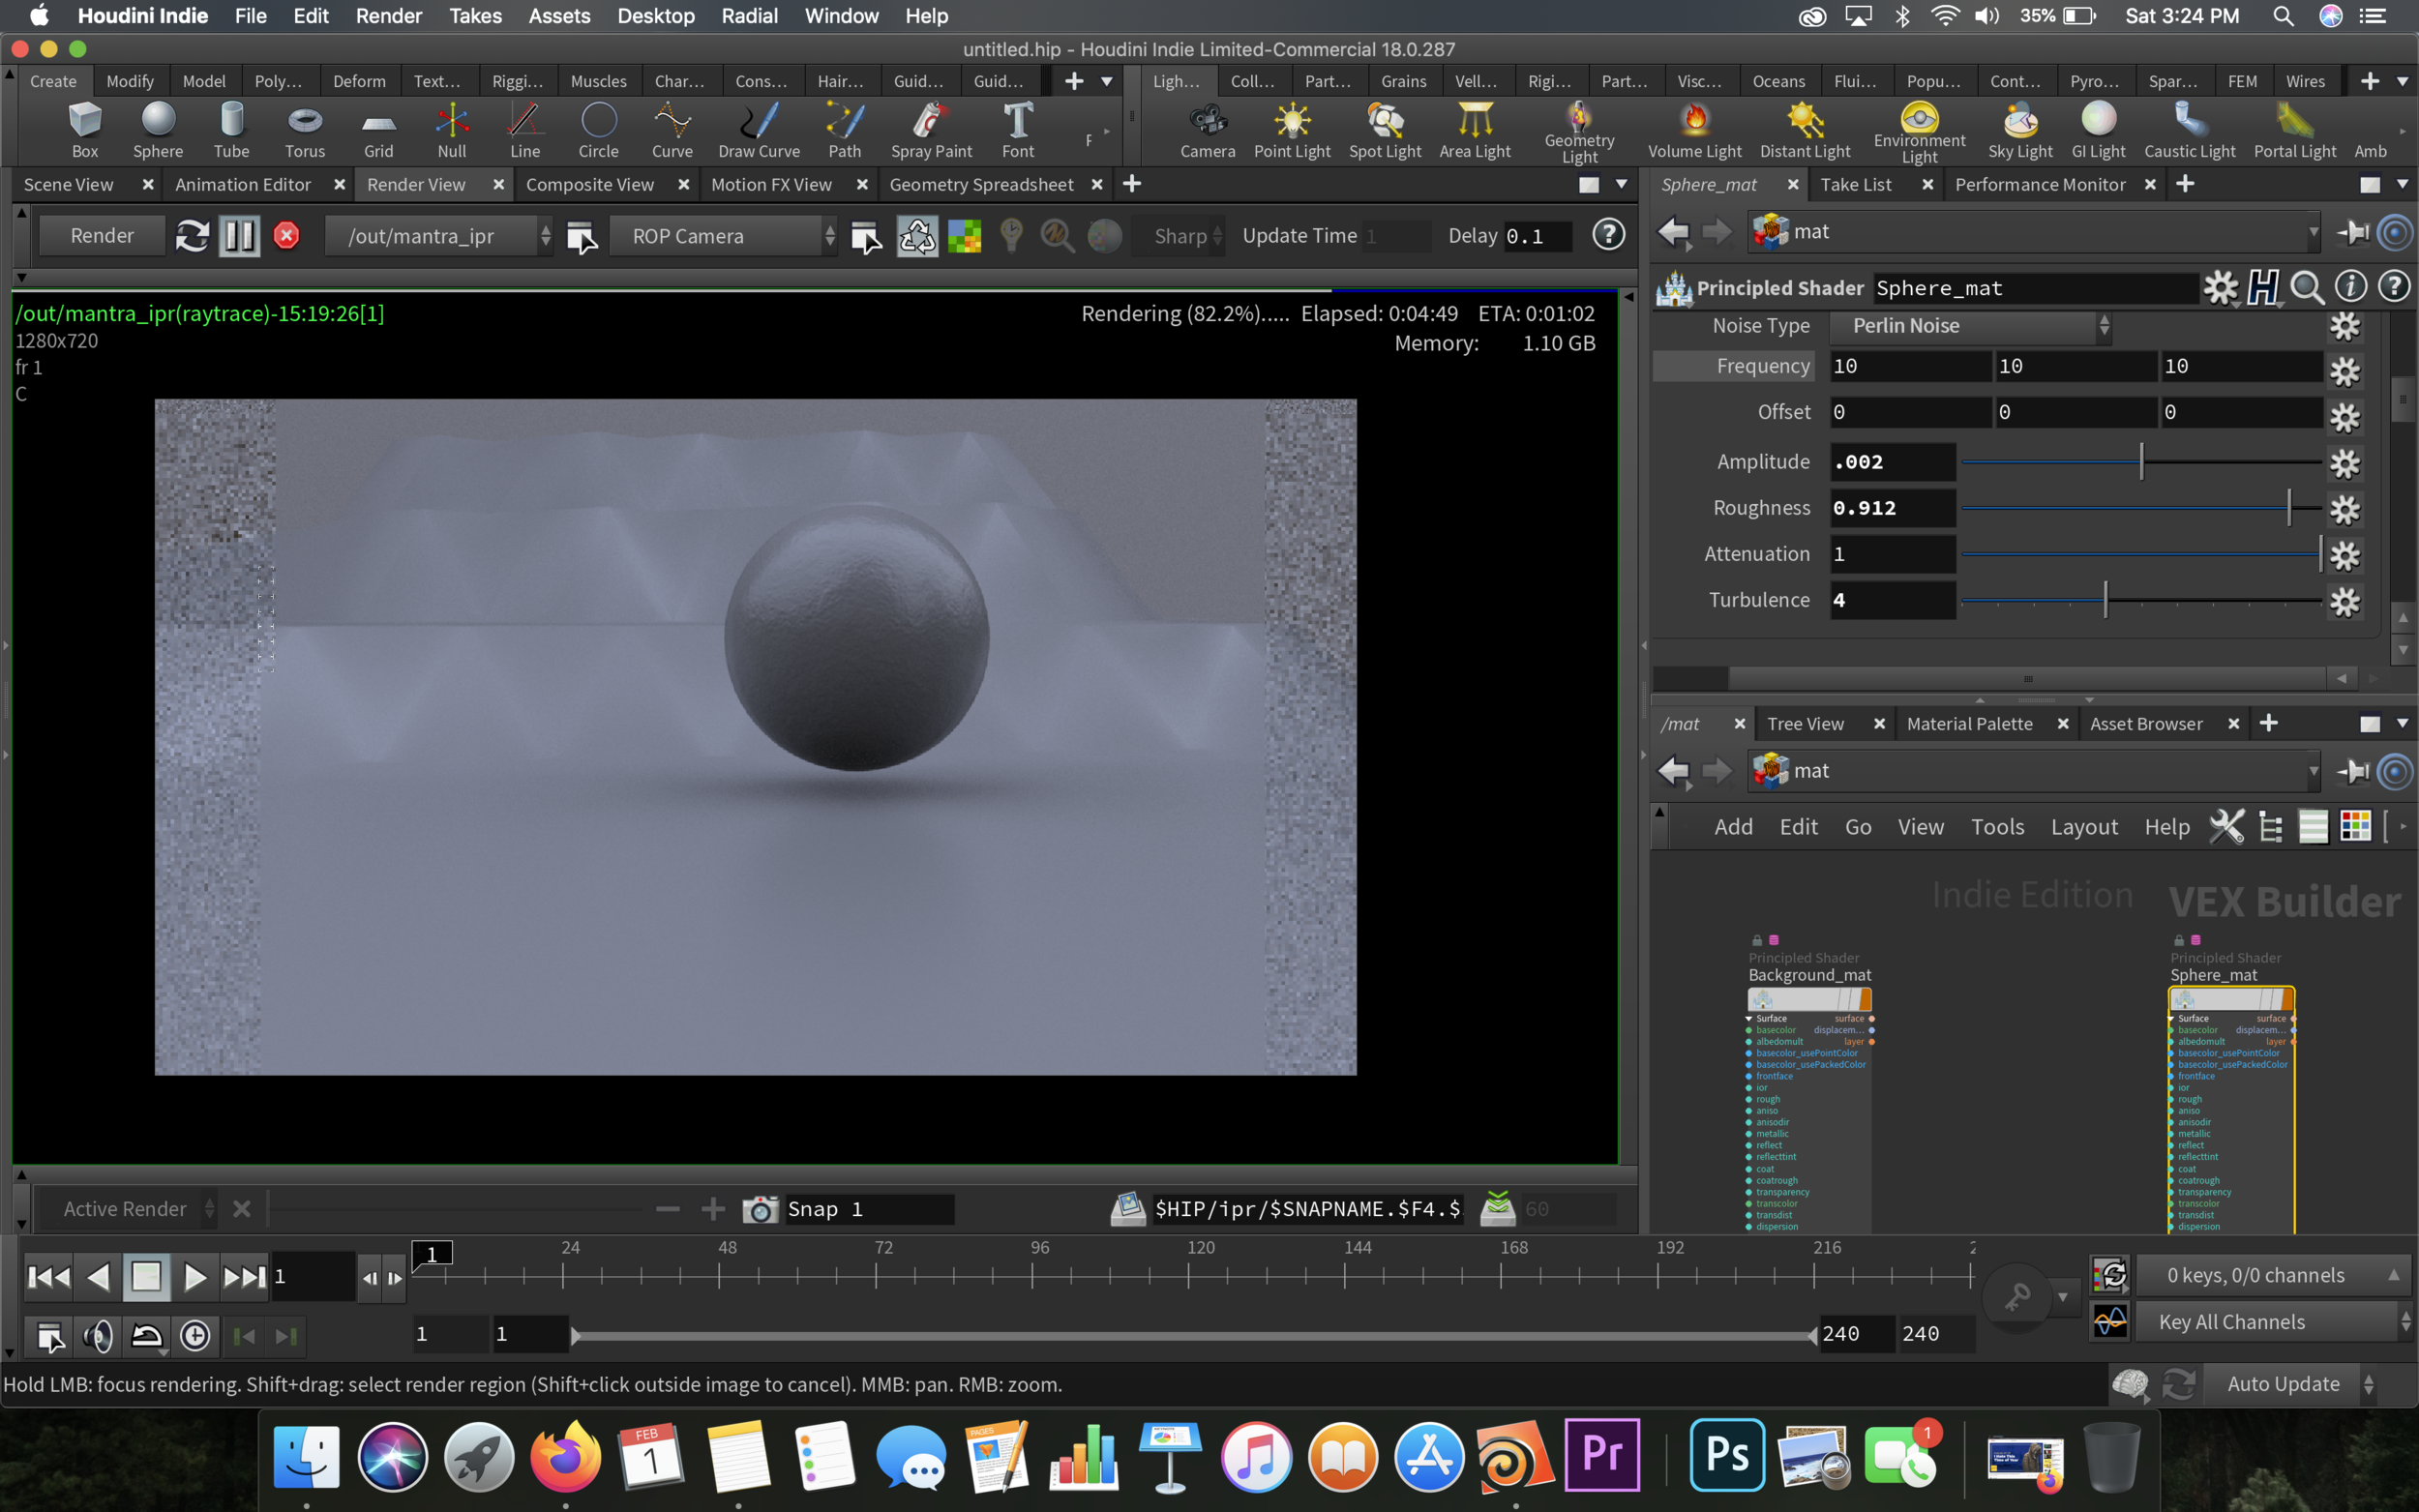
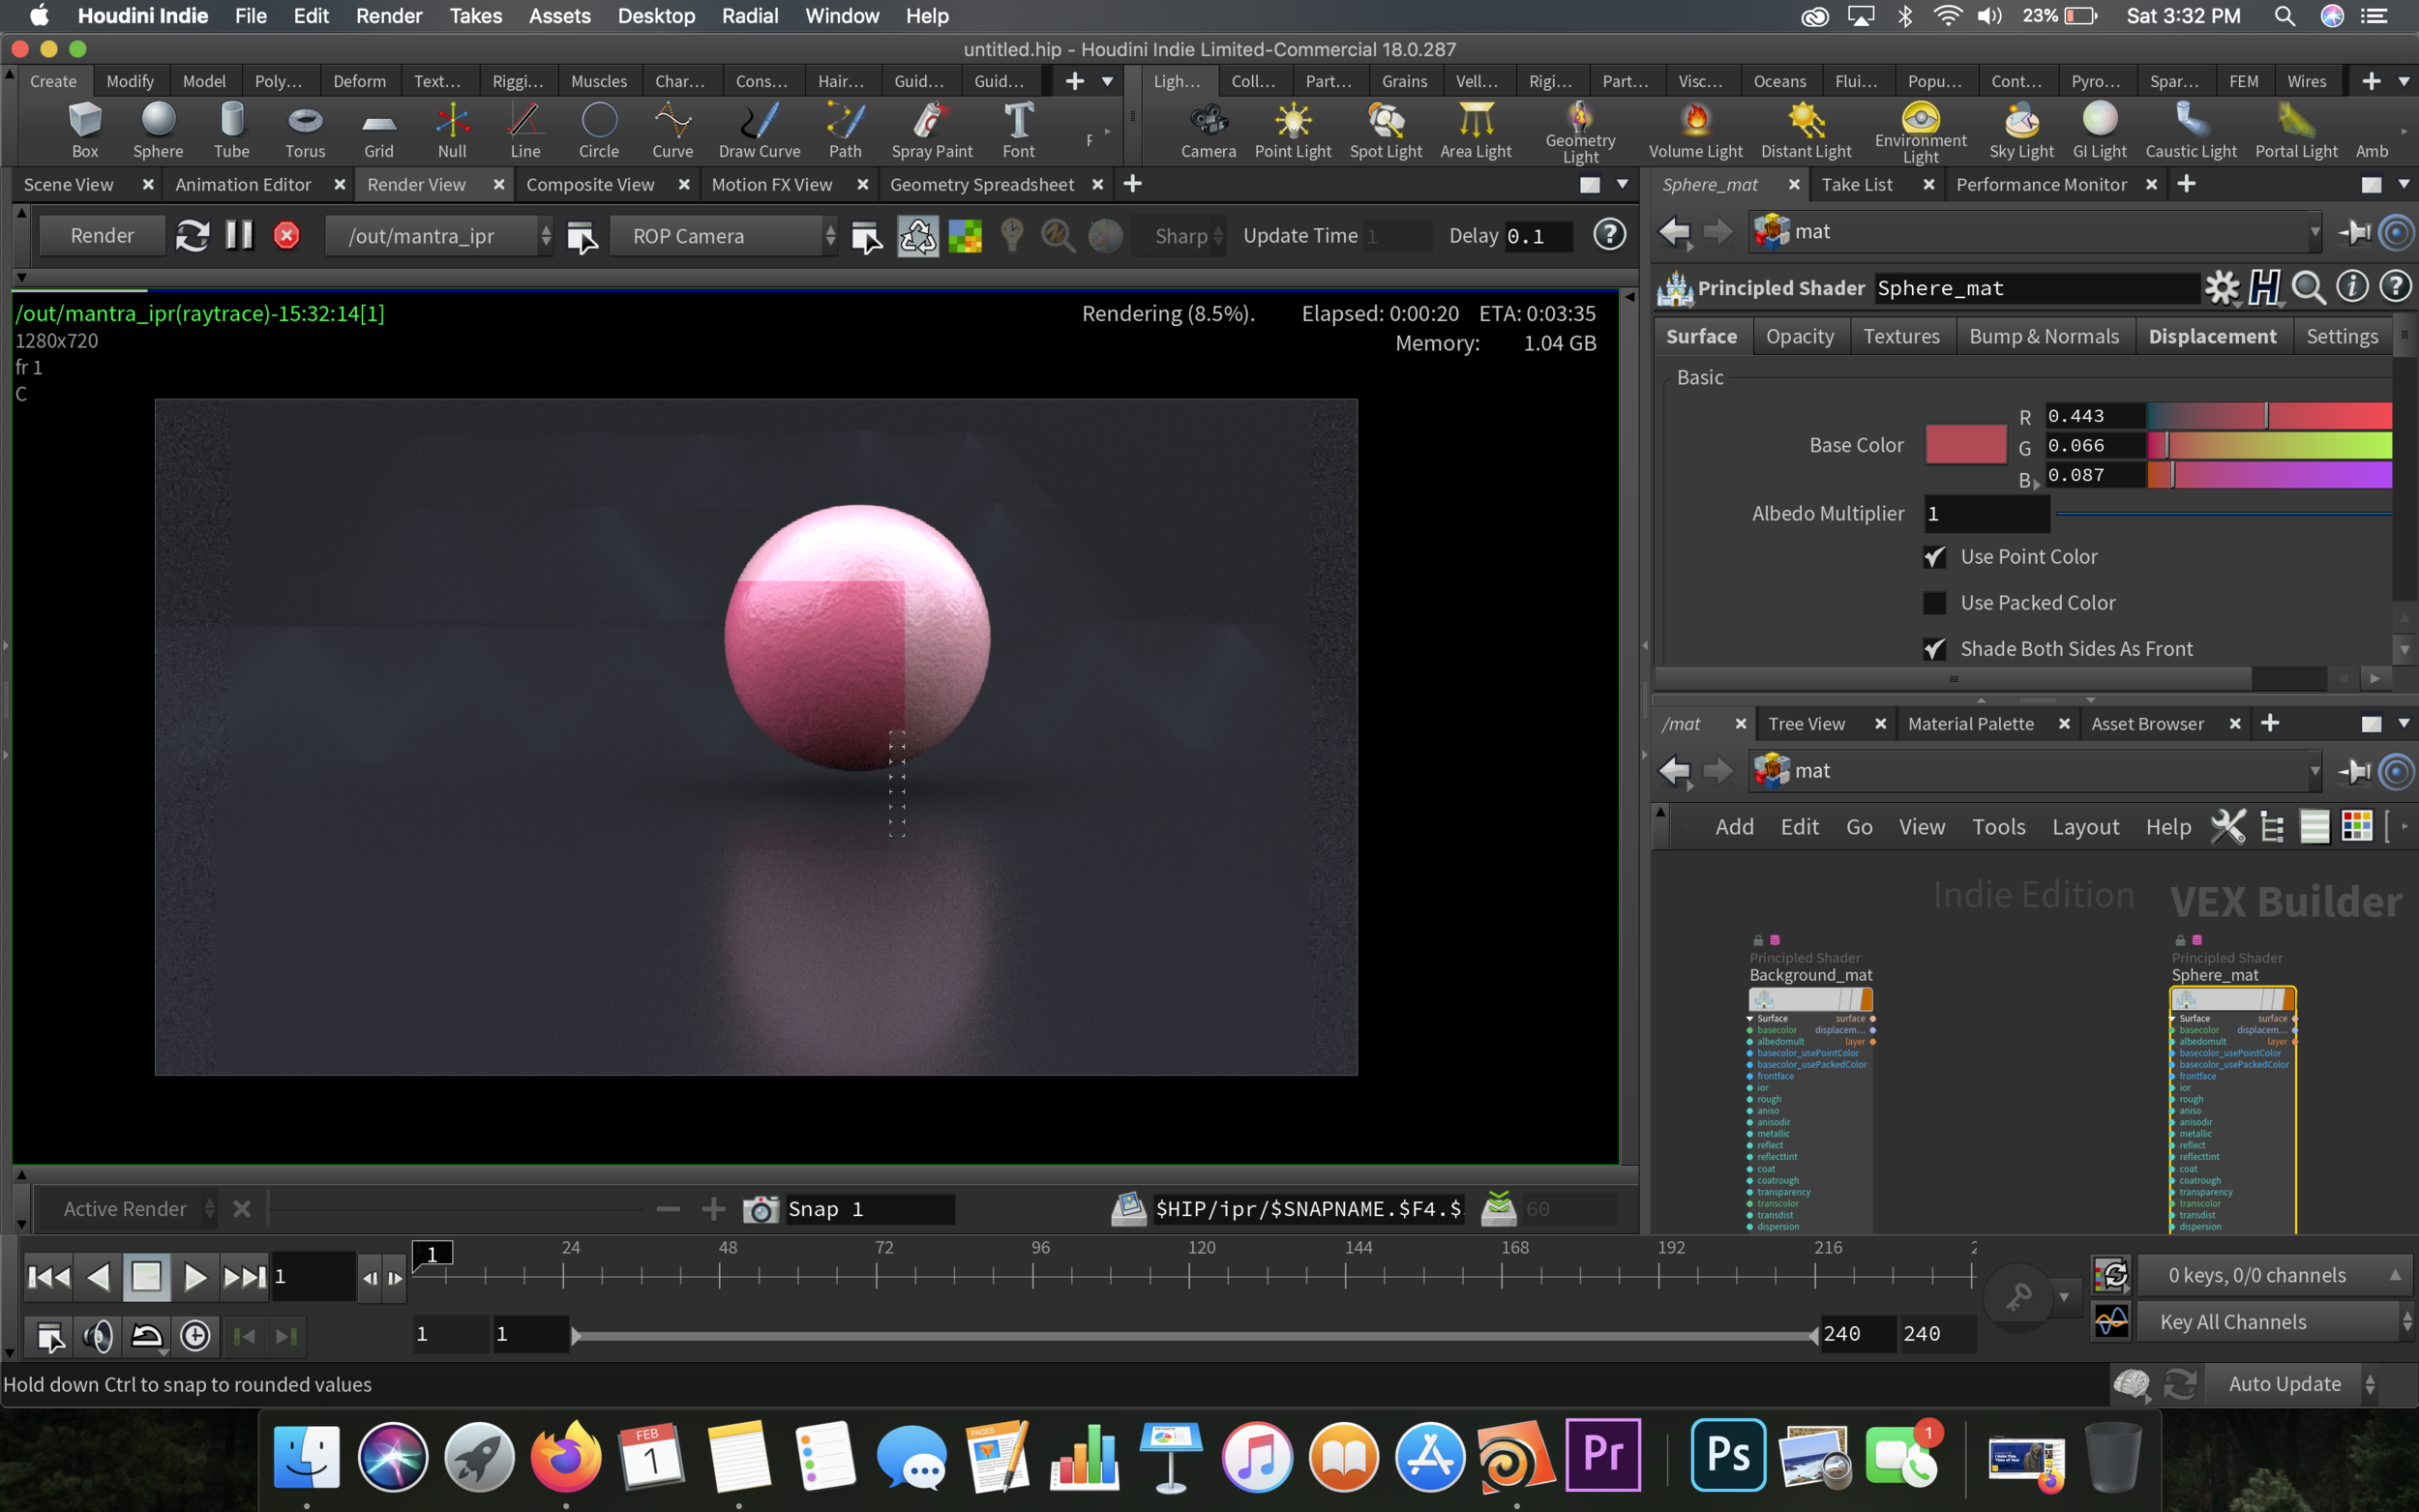
Mantra is basically Houdini’s built-in rendering agent or “renderer”. Essentially this is the section of the program you would use to output the final product from the program that could then be composited in a program like After Effects or dropped directly into an editor like Premiere pro for color grading or sound design.
Rendering, lighting and texturing are basically an interconnected web. A really cool, super artfully fulfilling web.
And if you have a reasonably fast computer, it’s (still) a slow web of trial and error. But when you get it just right and dial in the settings properly *Kisses Fingertips* MUAH. It’s incredibly gratifying.
Houdini gives you the artist a staggering amount of options to utilize and combine and connect in interesting ways to give you the textures and lighting that’ll make any animation or model shine given enough testing. You can even lookup specific measurements of things like IOR, Reflection indexes, Subsurface scattering and dozens of other scientific exactitudes that can give very specific results for creating the materials you want to see.
This amount of control over the look and feel of an object’s texture and look make art directing on a model incredibly straightforward (in Houdini’s typical complex way).
Here’s a smattering of fun little tests I did with these tools:
(It’s also worth mentioning that you can choose “Bucket rendering” which renders small squares starting at the middle and working slowly out so that you can see the finished look as it renders but only small chunks at a time, OR a render style that looks crazy-grainy and slowly fills in detail on the entire image overall until all at once you have the final image. Each way is useful for either viewing the exact look of the textures or the overall lighting of the image respectively. You can see both ways in different stages of doneness in the viewport images below. Check it.)


Lookout world, here I come with a very VERY basic knowledge of this program, start to finish.
Jake- out.