Episode 11- Disrupted Schedules and New Projects
Hey All!
As a quick aside, I missed last week for a post. I dropped the ball, but with all of this Coronavirus business going on and having recently taken a 3 day trip NYC right before all of that started to get out of hand, it’s been a bit of a crazy past couple of weeks. THAT BEING SAID, I’ve got a LOT of free time cooped up in the house for the near future, so you’ll most likely be seeing a bonus post or two in the coming couple of weeks.
Also, I’m not showing any symptoms and am keeping on top of this whole “Social Distancing” thing. (Pretty easy to do when you work from home.)
Ok, so this week I’m continuing a tutorial series I started in on some time ago, and the concept seemed decently simple, but is turning out to be quite a little monster of a project. So here’s the concept- We’re modeling a simple scene with a backdrop of cubes stacked together in random arrangements and sizes, and in the foreground is a pipe, (Super-Mario Bros. style) and a little cube platform. We’re going to then have a ball drop out of the pipe, bounce a few times, and on the last bounce it’ll turn into a liquid and splash across the platform.
Sounds simple enough, right?
Weeeeeell let me tell you pal, it actually is. I mean, each individual part is, but once you start combining a lot of simple parts together it’s pretty easy to get lost when something goes wrong. This is probably the most moving parts I’ve had to deal with in a project to-date with Houdini, but I think I’m able to stay afloat by being super meticulous with naming everything appropriately. This way, when I inevitably get lost, it’s fairly simple to go back and see where I fucked up.
Also, there’s this kinda neat little trick I JUST found out about that totally helps with keeping things together and seeing where I left certain nodes, which is called creating a “Network Box”. It’s basically Houdini’s own version of a folder. Sort of. It looks like this-
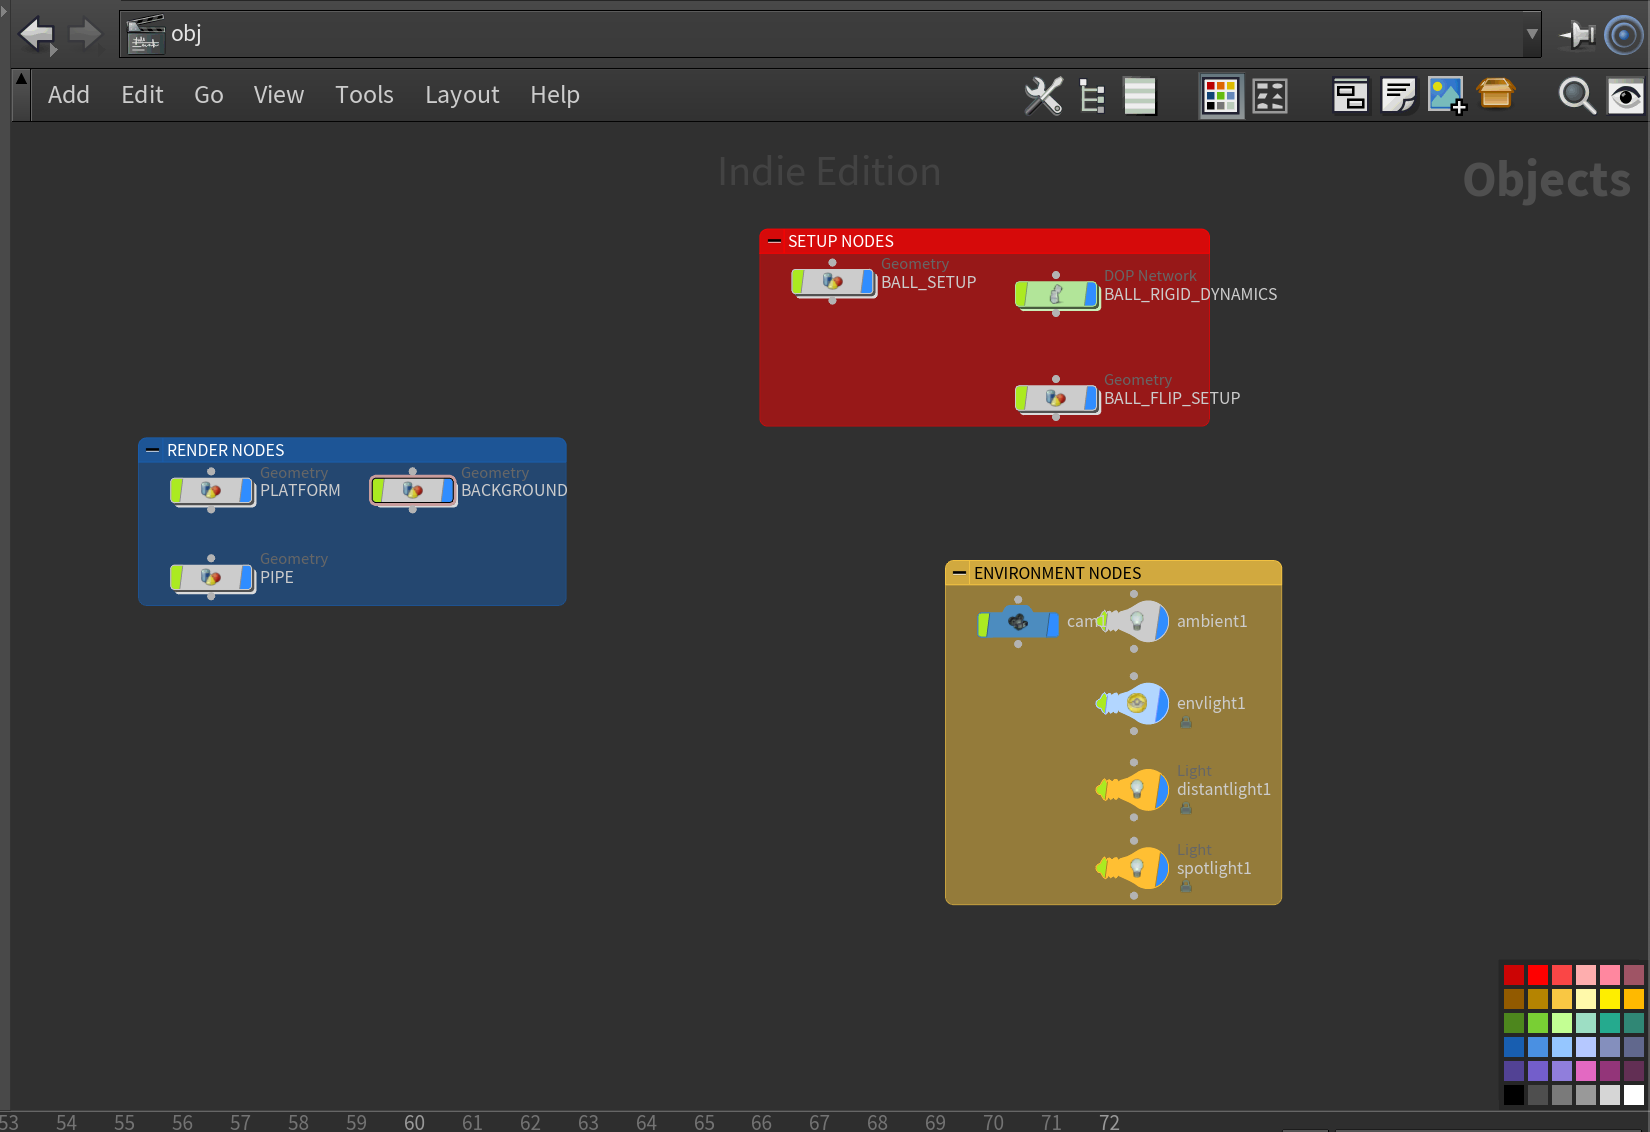
You’ll notice that you can see everything in each one, and you can arrange the nodes in each Network Box any way you like, so I’ve taken to simply stacking them in little columns. So in this way they’re more like a highlighter than a folder I guess. But the really cool thing about them is that you can collapse them as groups, so if you arrange them by what function they each serve, you can collapse clusters of nodes you aren’t currently working on and free up precious work space. Plus you can color coordinate them which makes things nice and colorful and pretty to look at. So I’m pretty into that. I’ve been instructed by the tutorial to arrange them as “Render nodes”, “Setup nodes” and “Environment Nodes”. Essentially, this breaks down to nodes you’d use for modeling the pieces of geometry that make up the scene, dynamics and physics that affect and animate the geometry in the scene, and all of the lights, cameras, and textures on the geometry making it look good, respectively. That way when I’m modeling something, I don’t have to look at 10 other nodes that have no bearing on what I’m currently doing. ANYTHING to make using this program easier.
As of this week, I’ve caught up on this tutorial’s content and am eagerly awaiting the next part to finish this project out, but alas they haven’t released part 4 yet. What I have so far is a fully modeled scene, with each piece colored the way I want it to look, as well as fully lit with 4 different lights and a camera rigged up and ready to roll. I’ve also animated the ball dropping to my liking, and in the next part I’ll be learning about Houdini’s Liquid Simulation Operator called FLIP. (Short for for “Fluid Operator”.)
Anyway, hope you’re all staying safe in these strange times and washing your hands a bunch!
Here’s some screen shots from this week-


Jake-out.